Image Vectorizer
Download on the Mac App Store1 Importing an Image
Image Vectorizer can import most common bitmap file formats: jpg, jpeg, png, gif, tif, tiff etc… as well as being able to import images directly from your scanner.
There are several ways to get your image in to Image Vectorizer.
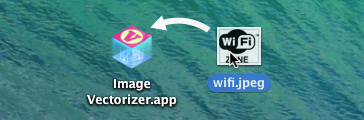
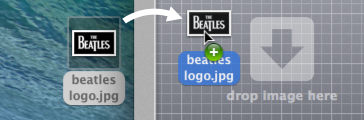
- Drag a suitable image on to the Image Vectorizer application icon. Fig.1.
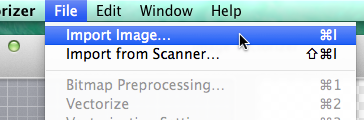
- Open Image Vectorizer and select 'Import Image…' from the File menu. Fig.2.
- Open Image Vectorizer and use the keyboard shortcut ⌘I
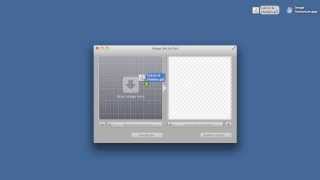
- Open Image Vectorizer and drag an image file into the left side of the main application window. Fig.3.
2 Importing from a Scanner
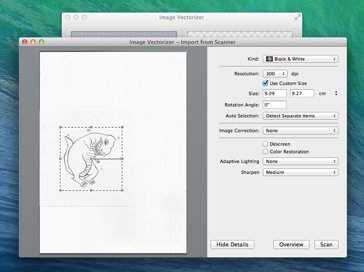
You can scan directly in to the Image Vectorizer application. Make sure your scanner is attached and switched on, the select 'Import from Scanner…' from the File menu (or use the keyboard shortcut ⇧⌘I).
The standard Mac OS X scan window will open and from here you can preview, select and scan directly in to the application. Fig.4.
3 Bitmap Preprocessing
Image Vectorizer provides various options for preprocessing images before converting them to vector format. Once you have imported an image in to the application you can access these options by clicking the 'Bitmap Preprocessing' button (or by using either the File menu or the keyboard shortcut ⌘1), to open the preprocessing panel.
The preprocessing panel is divided in to 4 sections (Fig.5):
- Section 1 contains rotate, flip and border controls.
- Section 2 contains color balance controls.
- Section 3 contains blur, sharpen and median controls.
- Section 4 contains image effects for halftone and outlining.
Preprocessing tips:
- You can toggle between the processed image and the original image by clicking the preview button to the left of the 'Bitmap Processing' button (You can also choose 'Preview Imported Image' from the 'File' menu or use the keyboard shortcut ⌘P).
- As well as adjusting the sliders, you can make precise adjustments by entering a value in the input field to the right of each slider.
- You can reset individual sections using the reset button, or you can reset all controls using the Reset all Filters button at the bottom of the panel.
- Some effect like blur make the image bleed out of its original size. You can increase the border to contain the effect.
- Halftone effects work great with photographic images.
- Brightness, contrast, and gamma are great for bringing out detail that might not get picked up during vectorization.

4 Vectorization
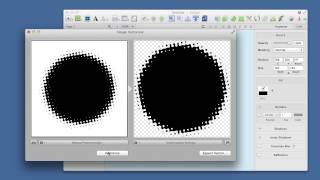
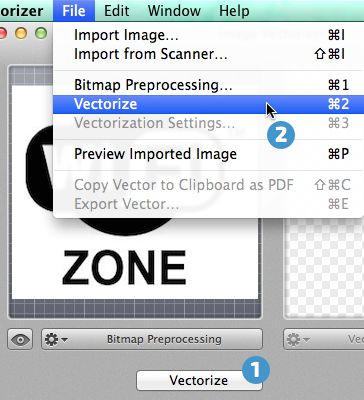
When you've finished any preprocessing of your image, you convert it to vector simply by clicking the Vectorize button 1 (you can also choose 'Vectorize' from the File menu or use the keyboard shortcut ⌘2 2). Fig.6.
On clicking 'Vectorize' you will see a progress bar as the app processes the image. On completion of the vectorization process the vectorized result will appear in the right side of the main application window.
If the result of the vectorization process is missing any elements from the original image, you can either try tweaking the original image using the bitmap preprocessing controls, or you can make changes using the 'Vectorization Settings'.
5 Vectorization Settings
Once you have adjusted you image and vectorized it, you can further tweak the vector image by opening the Vectorization Settings panel. You can do this by clicking the 'Vectorization Settings' button below the generated vector image (or by using either the File menu or the keyboard shortcut ⌘3).
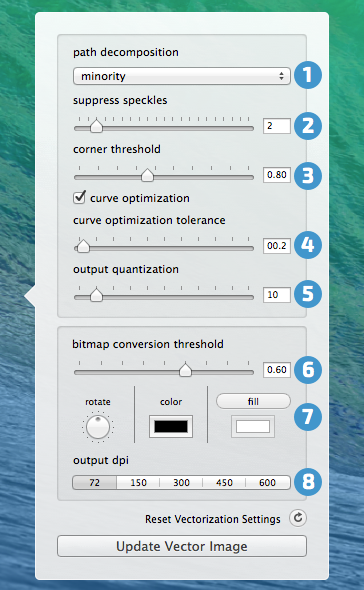
- 1 - path decomposition: controls how the vectorization algorithm draws paths.
- 2 - supress speckles: reduce noise in the image. The value is in pixels.
- 3 - corner threshold: smaller values produce sharper corners, larger values produce smoother corners.
- 4 - curve optimization: Larger values in curve optimization allow large curve segments therefore fewer nodes. However, if the value is too large the result may lose some accuracy.
- 5 - output quantization: determines the rounding of coordinates in the output vector file.
- 6 - bitmap conversion threshold: adjusts the threshold level of the vectorized artwork: smaller values produce a lighter image, larger values produce a darker image.
- 7 - rotate, color & fill: Using these controls, you can rotate the vector image, change the color & if necessary add a fill color.
- 8 - output dpi: This option can control the size of the final image. For example if the original is 300dpi and you select 300dpi, the resulting image will be 100% size but if you select 600dpi it will be at 50%. This setting has no effect for the DXF backend.
Vectorization tips:
- increasing the curve optimization helps reduce the amount of nodes.
- adjusting the bitmap conversion threshold can help bring out more or less detail.
- by default Image Vectorizer only creates images with 2 colors, however if you set a fill color you can then easily re-color all fill areas using a vector app like Sketch or iDraw.
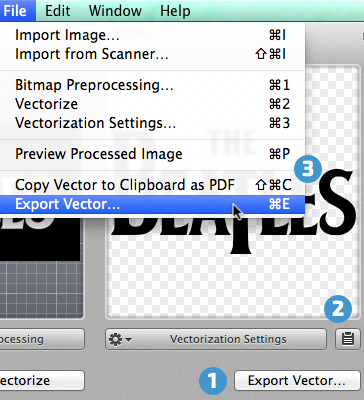
6 Exporting a Vector File
To save your finalised vector file, click the 'Export Vector…' button (you can also choose 'Export Vector…' from the File menu or use the keyboard shortcut ⌘E). Fig.8.1
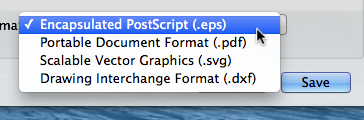
A save panel will open and you can choose from four different vector formats to save the file to: .EPS, .PDF, .SVG or .DXF. Fig.9.
As well as exporting a vector file, you can also copy the vector data directly to the clipboard by clicking the Clipboard button to the right of the 'Vectorization Settings…' button. Fig.8. 2 (you can also choose 'Copy Vector to Clipboard as PDF' from the 'File' menu or use the keyboard shortcut ⇧⌘C). 3
The vector data will be copied to the clipboard, ready to paste in to your vector editing app.
Examples of Image Vectorizer in use: